Here’s how to install OpenCV on OS X. I’m using:
- OS X 10.8.4
- Xcode 4.6.3
- OpenCV 2.4.5
I installed OpenCV using the Homebrew package manager, so install it if necessary.
brew tap homebrew/science

brew install opencv
If this doesn’t work, do a brew doctor and fix all problems it reports.
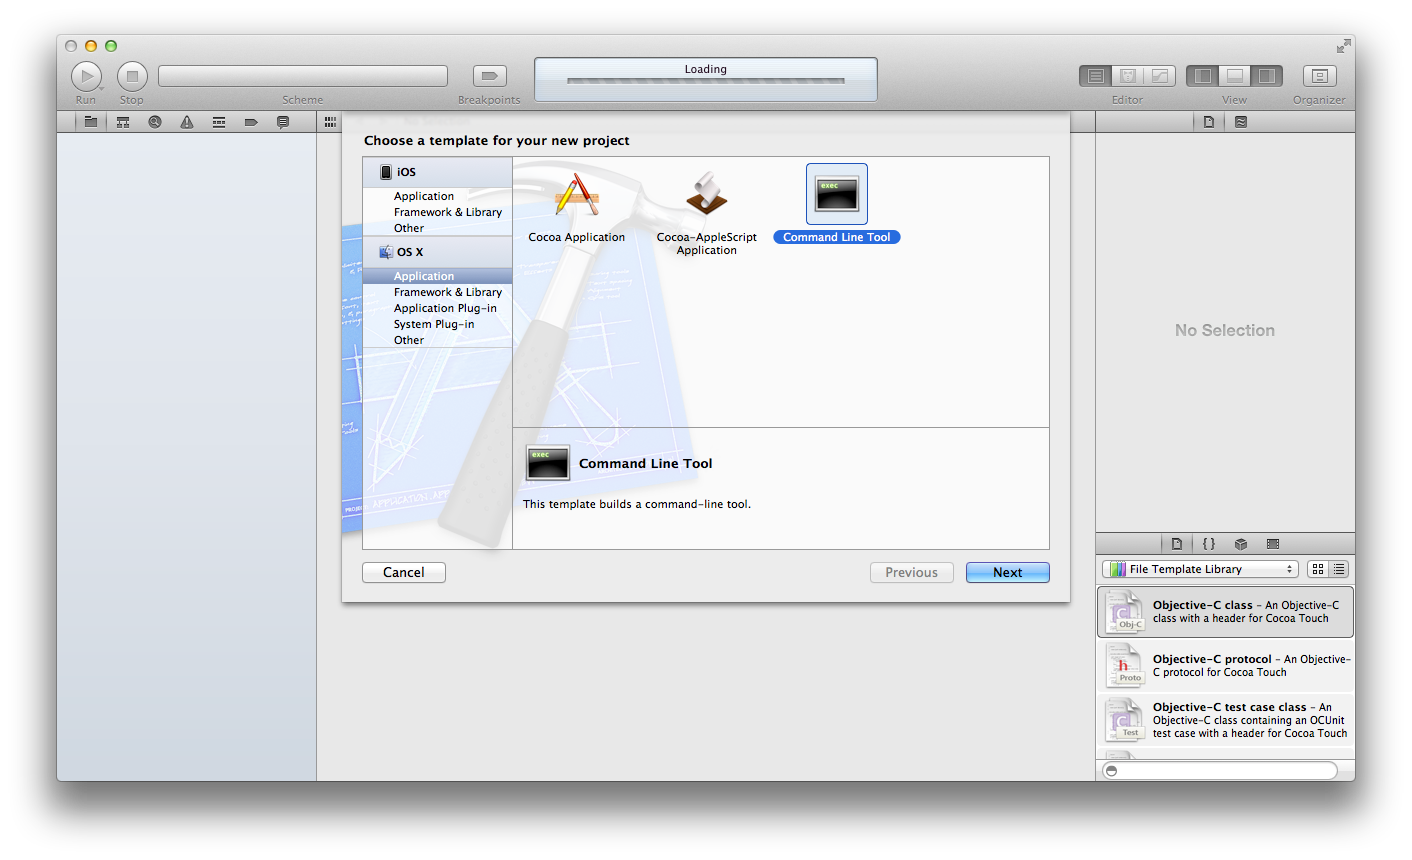
Open Xcode, and go to File > New > Project. Select Application under OS X and choose Command Line Tool.
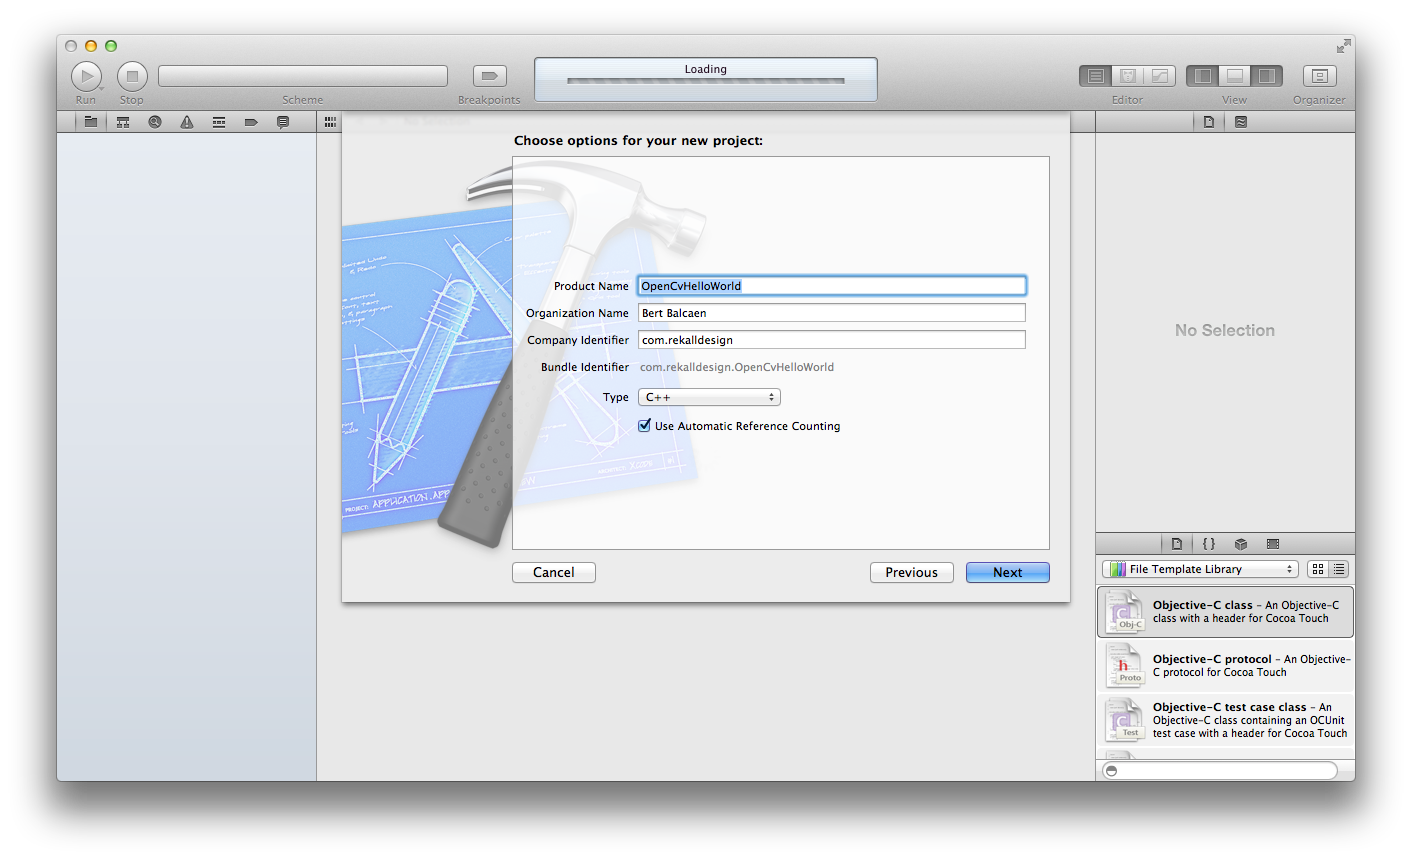
Give the project a name and make sure Type is set to C++.
Right-click in the Project Navigator and select New Group. Name the group OpenCV.
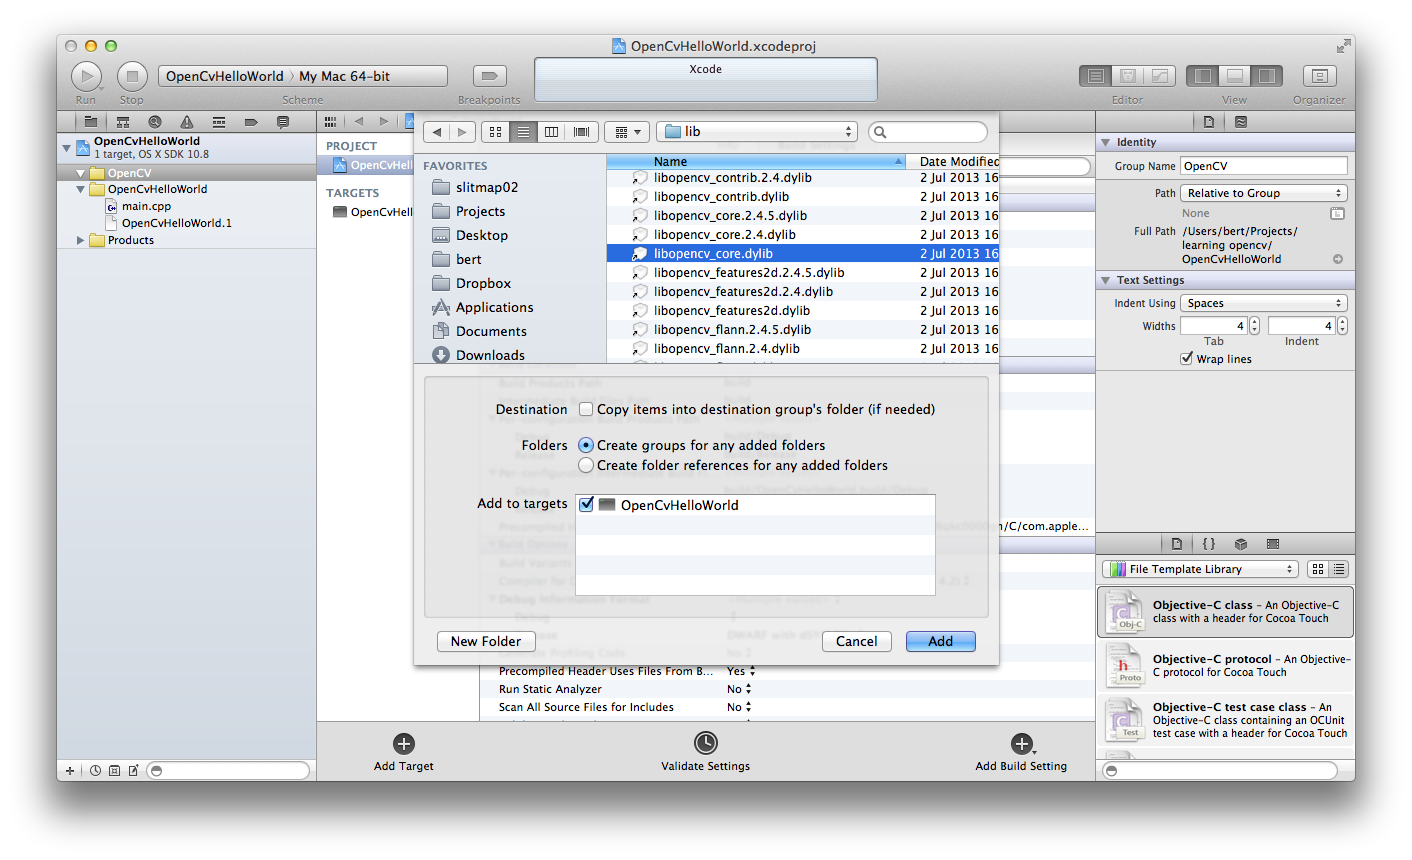
Right-click on the OpenCV group we just created and select Add Files to … In the file dialog, hit / (forward slash), so you can enter the path we need: /usr/local/lib. Select the following libraries:
- libopencv_core.dylib
- libopencv_highgui.dylib
This is the bare minimum. You might need other files depending on what you’re doing with OpenCV. For example, if you’re doing feature detection, you’re going to need libopencv_features2d.dylib.
Before clicking Add, make sure that Copy items is off, and Add to targets is checked.
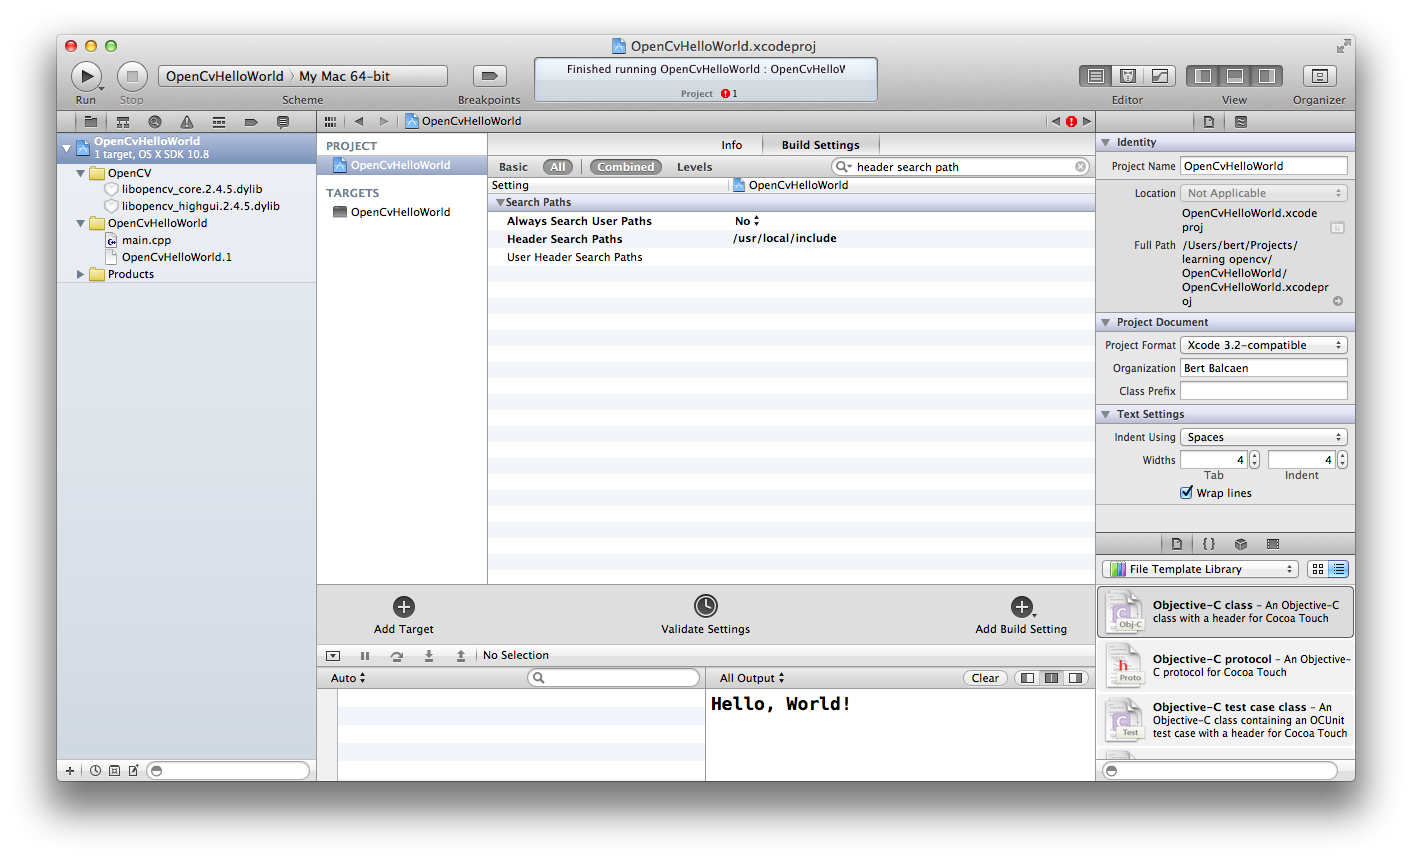
Now we need to tell Xcode where it can find the OpenCV headers. Click the name of the project in the Project Navigator. Next, click on the name of the project and then make sure the Build Settings tab is selected. Look for the Header Search Paths setting, and click the blank cell next to it to edit it. Click the plus sign in and add the path /usr/local/include.
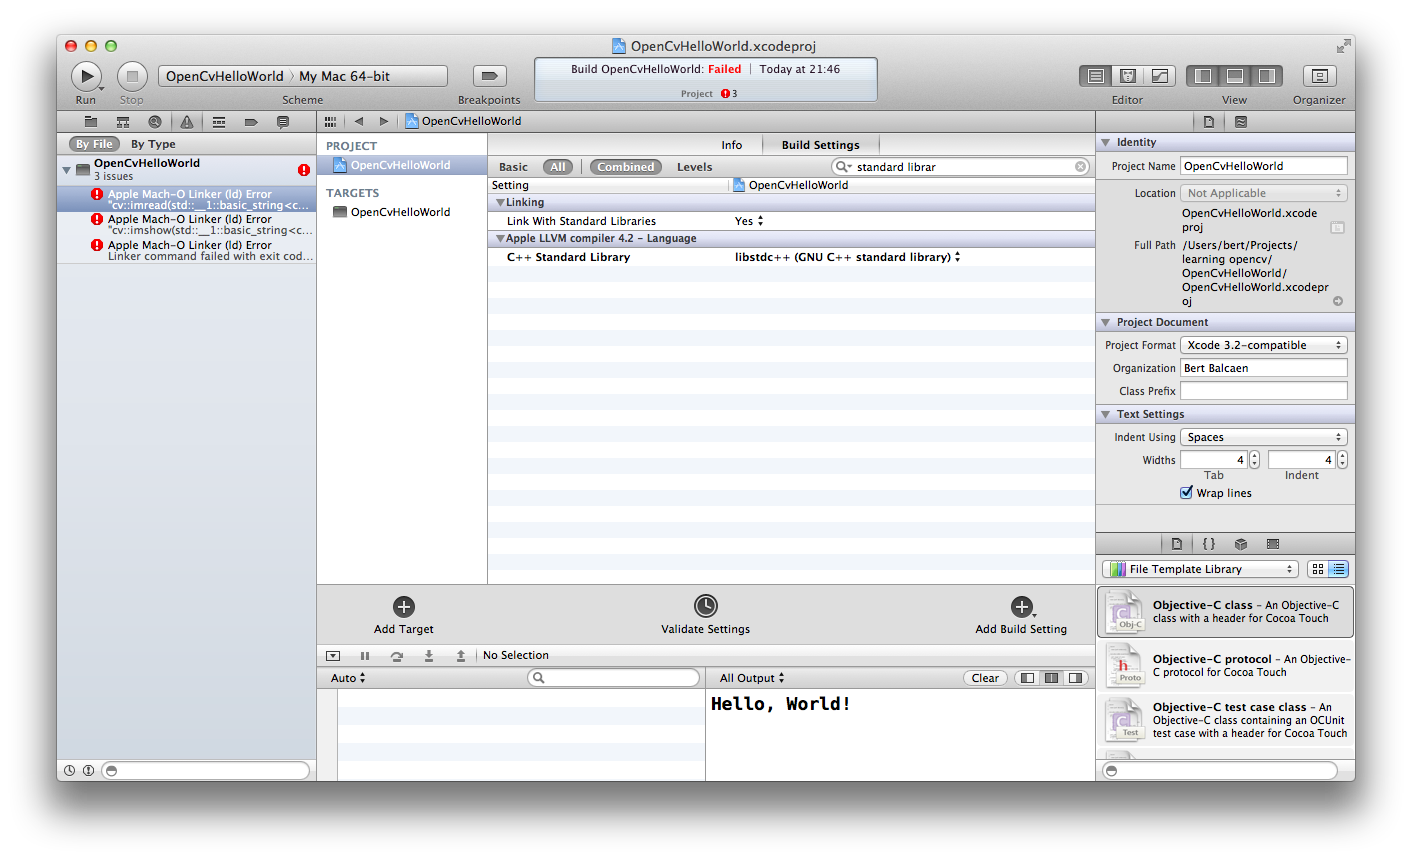
The last step is to change the standard C++ library used by the compiler. When I used the Xcode default (libc++), I got Undefined symbols for architecture x86_64 errors. We can change this also in the Build Settings tab, under the setting C++ Standard Library. Set it to libstdc++.
Let’s try if it works. Go to the Project Navigator and click the main.cpp to edit it. Replace the contents with:
#include

#include
int main(){
// load an image
// make sure you change the path!
cv::Mat img = cv::imread("/Users/bert/Desktop/test.jpg");
// check if image was loaded
if (img.data) {
std::cout << "Image loaded" << std::endl;
} else {
std::cout << "Image not loaded" << std::endl;
}
// create a window and show the image
cv::imshow("our image", img);
// wait for a key press
cv::waitKey();
}
When you click Run, this should display the image in a window. Hit any key to end the program.
Pingback: Why should I link GNU C++ Standard Library (libstdc++) when invoking opencv library on mac? »
i followed your guide to the tee, but i keep getting this compile error
Ld /Users/tawanda/Library/Developer/Xcode/DerivedData/OpenCVTest-biaarnoqlnwnyiawcxofqtmcdrld/Build/Products/Debug/OpenCVTest normal x86_64
cd /Users/tawanda/sandbox/c++/opencvtest1/OpenCVTest
export MACOSX_DEPLOYMENT_TARGET=10.11
/Applications/Xcode.app/Contents/Developer/Toolchains/XcodeDefault.xctoolchain/usr/bin/clang++ -arch x86_64 -isysroot /Applications/Xcode.app/Contents/Developer/Platforms/MacOSX.platform/Developer/SDKs/MacOSX10.11.sdk -L/Users/tawanda/Library/Developer/Xcode/DerivedData/OpenCVTest-biaarnoqlnwnyiawcxofqtmcdrld/Build/Products/Debug -F/Users/tawanda/Library/Developer/Xcode/DerivedData/OpenCVTest-biaarnoqlnwnyiawcxofqtmcdrld/Build/Products/Debug -filelist /Users/tawanda/Library/Developer/Xcode/DerivedData/OpenCVTest-biaarnoqlnwnyiawcxofqtmcdrld/Build/Intermediates/OpenCVTest.build/Debug/OpenCVTest.build/Objects-normal/x86_64/OpenCVTest.LinkFileList -mmacosx-version-min=10.11 -Xlinker -no_deduplicate -stdlib=libstdc++ -lopencv_core.3.1.0 -lopencv_highgui.3.1.0 -Xlinker -dependency_info -Xlinker /Users/tawanda/Library/Developer/Xcode/DerivedData/OpenCVTest-biaarnoqlnwnyiawcxofqtmcdrld/Build/Intermediates/OpenCVTest.build/Debug/OpenCVTest.build/Objects-normal/x86_64/OpenCVTest_dependency_info.dat -o /Users/tawanda/Library/Developer/Xcode/DerivedData/OpenCVTest-biaarnoqlnwnyiawcxofqtmcdrld/Build/Products/Debug/OpenCVTest
ld: library not found for -lopencv_core.3.1.0
clang: error: linker command failed with exit code 1 (use -v to see invocation)